
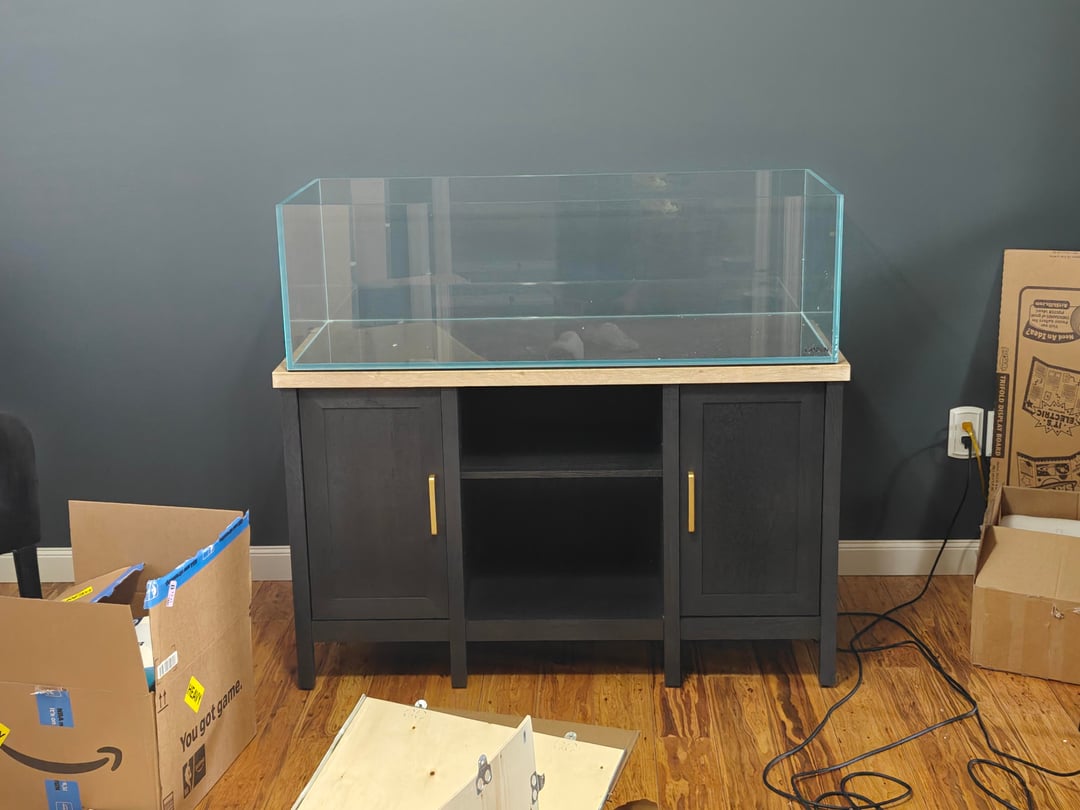
I'm 99% sure that I already know the answer. But here it is. I just got my Landen 51 gallon, rimless shallow delivered.
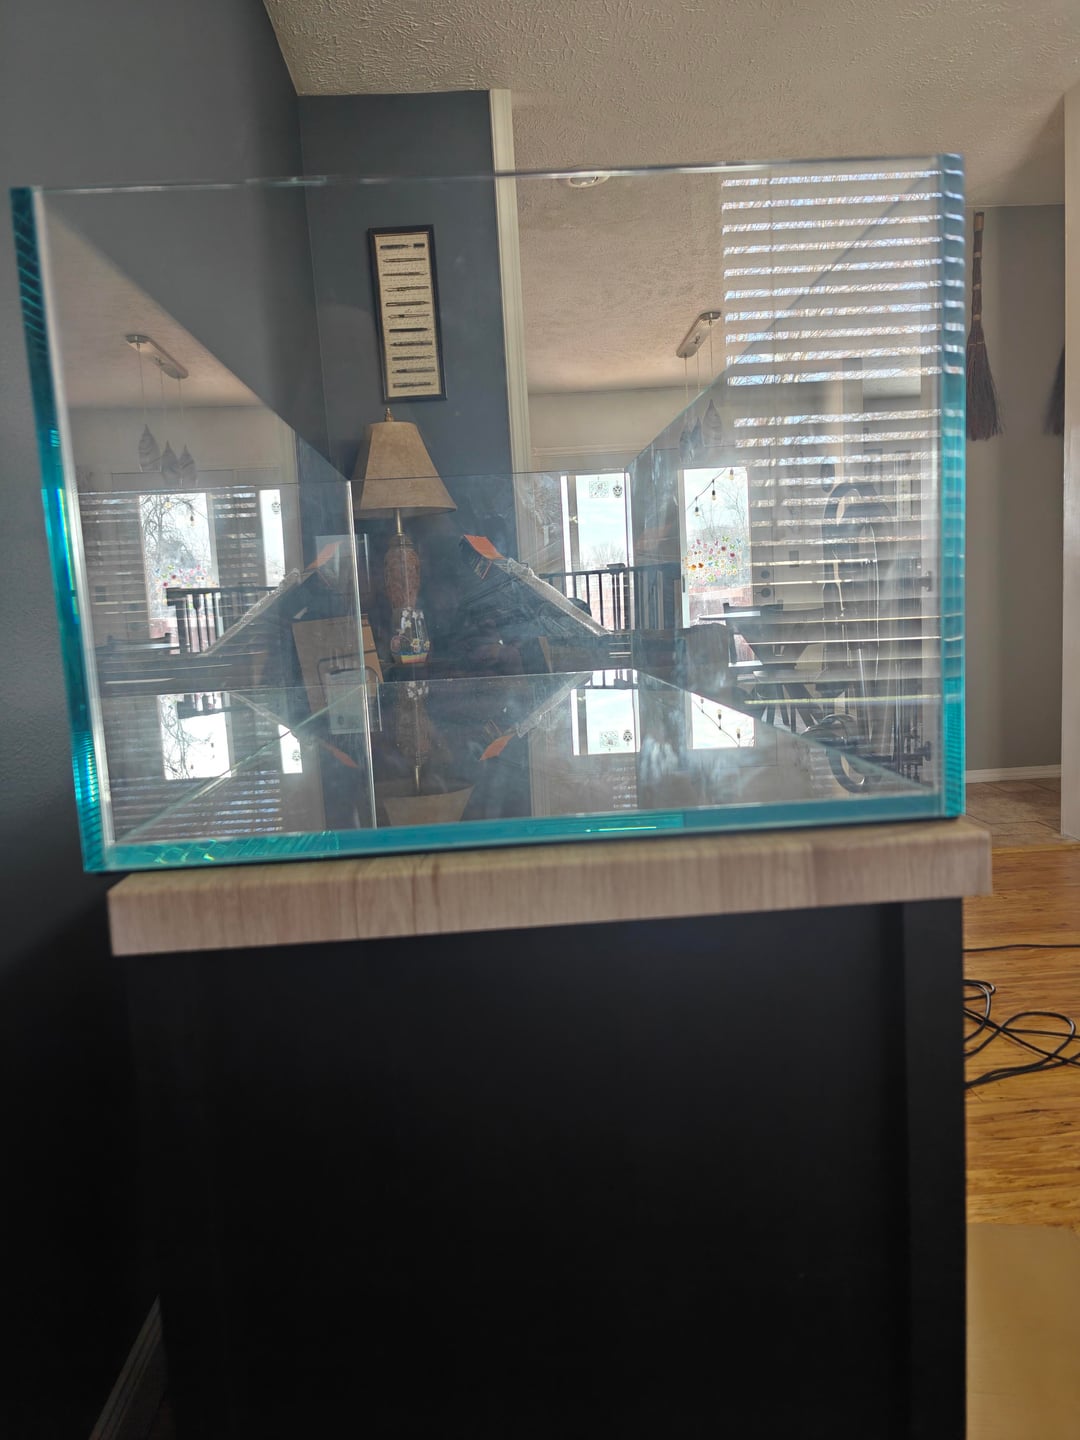
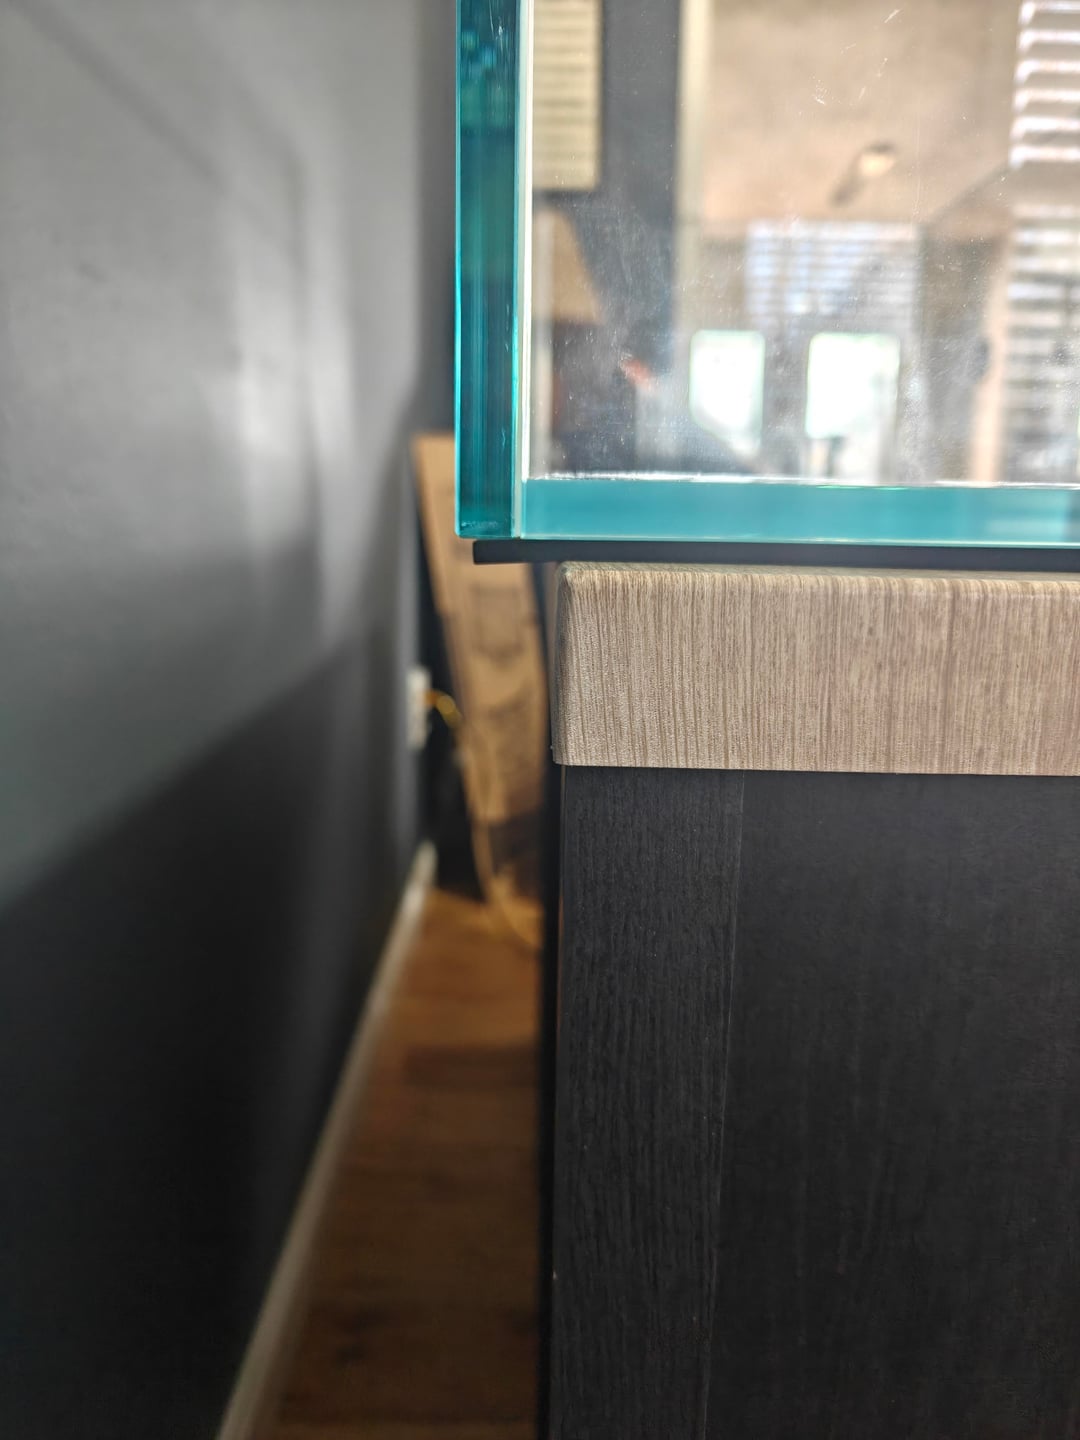
It overhangs the stand, depth wise by 0.73"
I don't like overhang, but is this enough to cause an issue?
I'm ready to go to Lowe's, grab plywood that would sit right under the overhang portion and touch the floor for support. Essentially, drilling the plywood to the stand.
Posted by Takillda
22 Comments
If you know physics it’s 80% fine
Commenting to boost, I would also like to know!
NOOOOO rule of thumb is Aways have the 4 tank corners touching solid surface. if the STAND top overhangs thats normal, a lot of aquarium stands are built like that but Not the aquarium itself
If this was a 5g, you’d be fine. Buy the plywood or this will haunt you until the day it either breaks or you drain it.
Big nope.
As an engineer I always treat fish tanks like equipment at work.
The equipment was designed to be used a certain way and was tested while being used that way.
When a client asks if something will work being used in a different way the answer is always “we don’t know”. They will push for a guess or what we think but we refuse to answer.
If you want peace of mind, use the equipment as it is designed to be used.
1/4″ plywood cut to the dimensions of the tank. The seams will inevitably fail if you leave it as is
Redsea tanks have the front glass floating over the doors (not touching) so it should be fine as long as the bottom panel is touching (slide forward a bit so just the front and back float). I definitely wouldn’t set it as is where part of the bottom panel is overhanging…
* Not advice just information lol.
My Red Sea tank/stand was made like that and it failed across the front corner after a couple of years. It might be alright but for peace of mind do the plywood thing.
If you’re asking then you doubt the integrity of it yourself. Cut a piece of plywood to the dimensions of the tank, paint it or whatever so it looks gud, then place and fill your tank. Never risk a catastrophe.
I would say it’s fine, especially with a rimless tank that uses thicker glass. That being said, now’s the time to secure peace of mind for the lowest cost/effort.
Get a piece of 1×6 poplar or pine. You can stain it to match the top. Then screw it across the back as a stringer.
Unrelated but where did you get this tank from! I can’t find it on the Landen Aqua site
Do the plywood! For peace of mind if nothing else. Can paint/stain and then seal to match the stand.
I bought the 55g and matching stand. It overhangs flush with the doors and grown to be more comfortable with it after a while.
I wouldn’t use plywood unless you plan to seal it really well. Plywood acts like a sponge if it gets wet. Use solid wood at least and still seal it. You couple also use pvc trim and never have to worry about it.
you already have a plan and know what to do, just do it & thank yourself later
The corners of the tank absolutely should be in contact with the surface. 100%, use plywood if you’re going to use this stand. I did this once for: I also sanded the edges of the plywood and treated it or stained with something to protect against water.
Are you handy? You can replace that top.
I’d get a piece of wood to cover the existing stand top, but just large enough to allow your entire tank to have support. Seal the wood. Glue the top and the plywood together. Place leveling mat and your good.
Just to offer another option:
– strictly for aesthetics
you could get a piece of say;
~3/4” x 1-1/4” x length-of-tank-stand
hardwood trim, some wood glue, and some beefy screws and join it to the rear of the stand and extend it’s depth.
Basic steps:
– scuff up the finish along the back edge of the stand top
– cut your trim to match the length of the stand
– make sure the top-edge of the trim-piece is flush with the table top, pre-drill ~6–8 screws through the trim, from the rear, straight in to the stand-top
– apply glue to the stand and the trim piece and screw it in place
– wipe off the excess glue with a damp rag and wait 24hr
Now your stand has 3/4” more depth, no ugly plywood faux-top, and only looks modified on the 3/4” at the back. All the screw heads face the wall. For bonus longevity add a quick clear-coat or sealing oil onto your added trim piece and I’d be surprised if anyone ever noticed.
Requires a bit more craftiness than an ugly chunk of plywood but you can likely get the guys at a supply-yard to cut your lengths so really it’s just screwin n gluin
…just my two-cents. Lookin forward yo seein it all set up.
go to Lowe’s, grab plywood
get 1inch ply, 3/4 at the very least. there should be 4×4 sheets that they will then cut down to your width.
1/2 inch and 15/32nds will not cut it.